Living
How To Quickly and Easily Edit Photos in Lightroom
I once used 6 rolls of film on a field trip to the state capital. It was a day-long trip, and I was about 10 years old, so I suppose you could say that I’ve always enjoyed taking photos. I’m not a professional photographer, but love taking photos of my family and for my blog. But one of the things I’ve grown to love most is the ability to edit those photos – to make them look bright, clean, and beautiful. One could argue that editing isn’t “natural” and sometimes, it’s not. I’m not perfecting blemishes – I’m enhancing color. Brightening and lightening.
How To Quickly and Easily Edit Photos in Lightroom
Does anyone else remember when we’d take photos and edit them with really bad Instagram filters? Sure, those weren’t DSLR photos, but I did this and it wasn’t good. Then we shifted toward things being a bit more natural. When I first got into digital photography, I did a little editing in Photoshop, and eventually, moved on to Adobe Photoshop Lightroom on both my computer and iPhone with Lightroom mobile app. And yes, I destroyed a photo or two with the Valencia filter. 😂 If i’m on the go, I’ll use VSCO and Snapseed, too.
So let’s talk about Lightroom
I still use Photoshop almost every single day – mostly to create graphics and product roundups for my blog. I use Canva, too – you can see what I do with Canva in this post. But I’m a little bit old and after using Photoshop for (literally) half my life, I’m so used to it. If you’re new and looking to create better graphics, I’d give Canva a try. But for photo editing, LR is where you want to be, so I want to share my editing process with you.
Signing up for a Lightroom subscription
I have a personal Adobe subscription and use both Photoshop and Lightroom all the time. The Creative Cloud app is just $9.99 a month and includes, Lightroom, Lightroom Classic CC, Photoshop on desktop and iPad, and 20GB of cloud storage with up to 1TB available. You can add on a subscription to Adobe photos, too. If you’re not sure you want to commit, you can try Lightroom for free for 7 days.
If you look at all the programs I use – and there are a lot of them – Lightroom is undoubtedly is the most powerful photo editor you can use. Today, I’m going to focus on DSLR photos taken with my digital mirrorless camera.
What’s the difference between Lightroom and Lightroom classic?
Lightroom Classic is a desktop based application and Lightroom is a cloud based suite. If you want to quickly and easily edit photos, you’ll want to learn a little bit more about your camera and it’s settings. That’s code for learn how to take a decent photo. I am not a photographer, but I know how to use my camera. And if I can learn, so can you. If you’re starting with a good photo, your results are going to be better. But if the photo isn’t that great, there’s only so much you can do. It’s not wizardry.
I’m not going to each you everything you can do in Lightroom.
Why? Well, I don’t know how to do absolutely everything in Lightroom. And the second is that this is how I quickly and easily edit photos in Lightroom, so it’s a basic Lightroom tutorial for simple editing. So if you want to brighten, lighten, and color correct, this is the post for you, but try playing with these settings a bit to figure out your look. You can spot treat, but that’s not my favorite thing to do in Lightroom. And this might be untraditional (I’m not really sure) but if and when I do that kind of editing (removing dirt or trash in the background, for example), I export my photo to Photoshop because I’m better at doing that kind of editing there, and feel like it’s more accurate. So a mix of Photoshop with Lightroom is what works for me.
So here’s my quick and easy guide for editing photos in Lightroom
Import your images to Lightroom
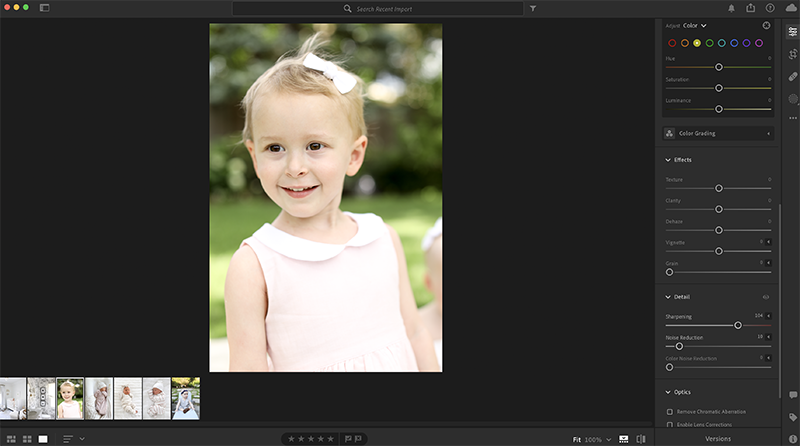
The first step is to import your photo(s) to Lightroom. Click file and import photos and videos. Either drag your raw photos (you can shoot in JPEG and I do for my blog since the files are smaller and it’s fine/easier). to the Lightroom icon or go to “file” and “import photos and videos.” I would normally import a bunch of photos from one shoot, go through them, delete the ones I don’t need, and then edit the ones I love. But today, I’m importing a handful of different photos, so it will look a little different.
The first step
Start out with the lens corrections and transform panels. These can be found under develop, but if there’s ever a function you can’t find, click help at the top and type in what you’re looking for. These tools will correct any possible lens distortions on each image.
Decide which photos you want to keep/edit
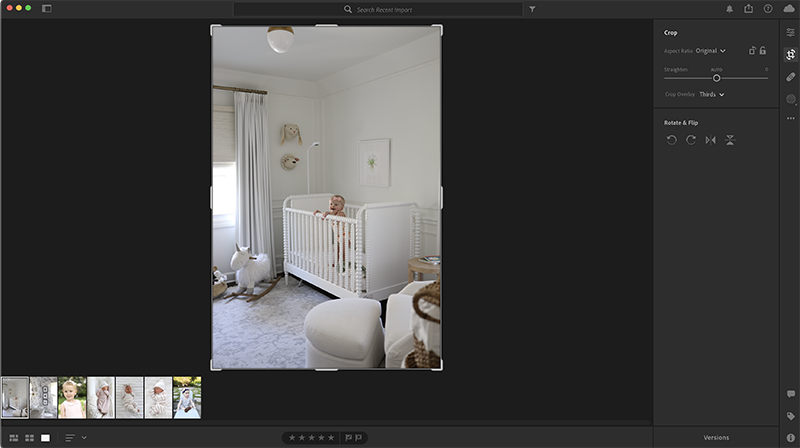
Straighten your photos
This is one of the most basic adjustments, but it makes a difference. You’ll see everything you need on the right side. To straighten a crooked photo, select the crop tool (it’s highlighted on the right). Then drag the straighten bar (just a little bit) until things look right. Easy, right? Ok, you’re not done just yet.
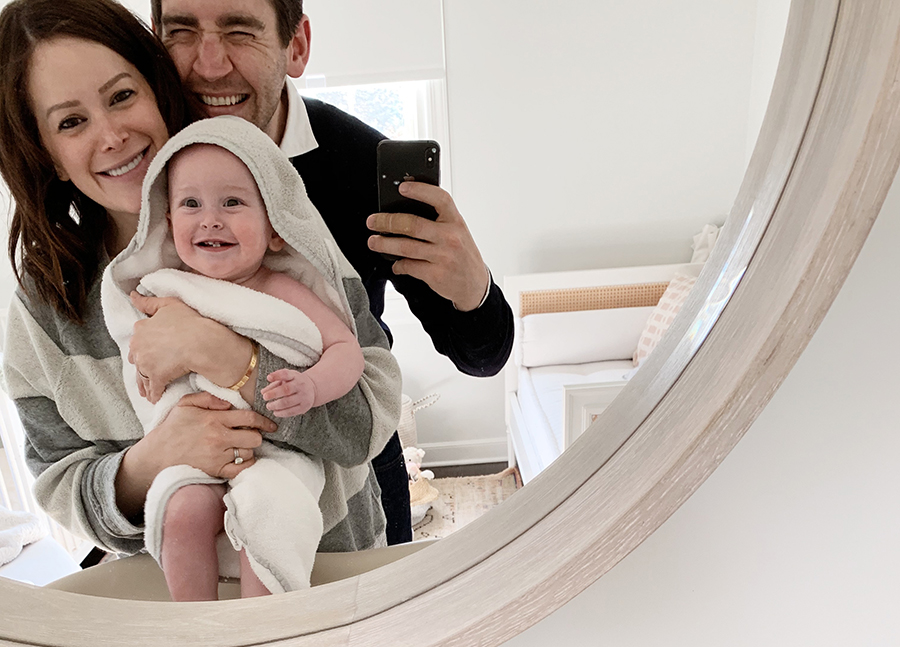
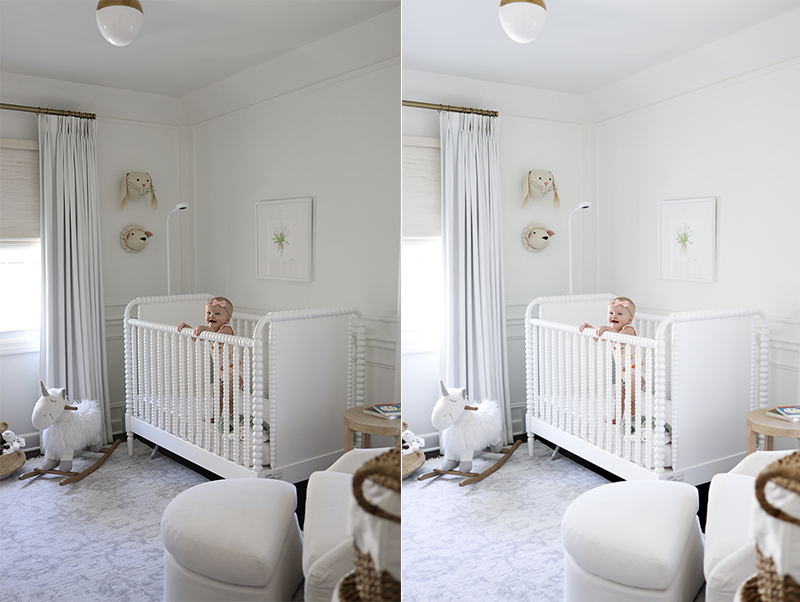
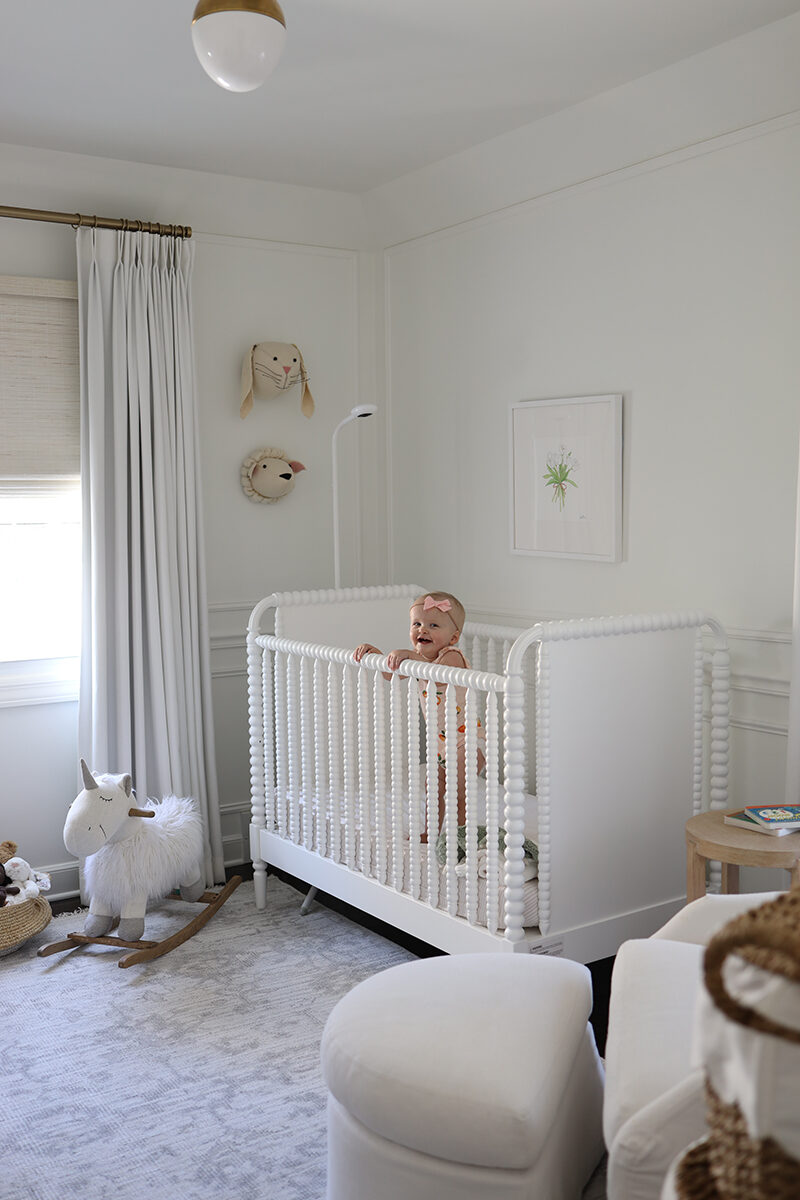
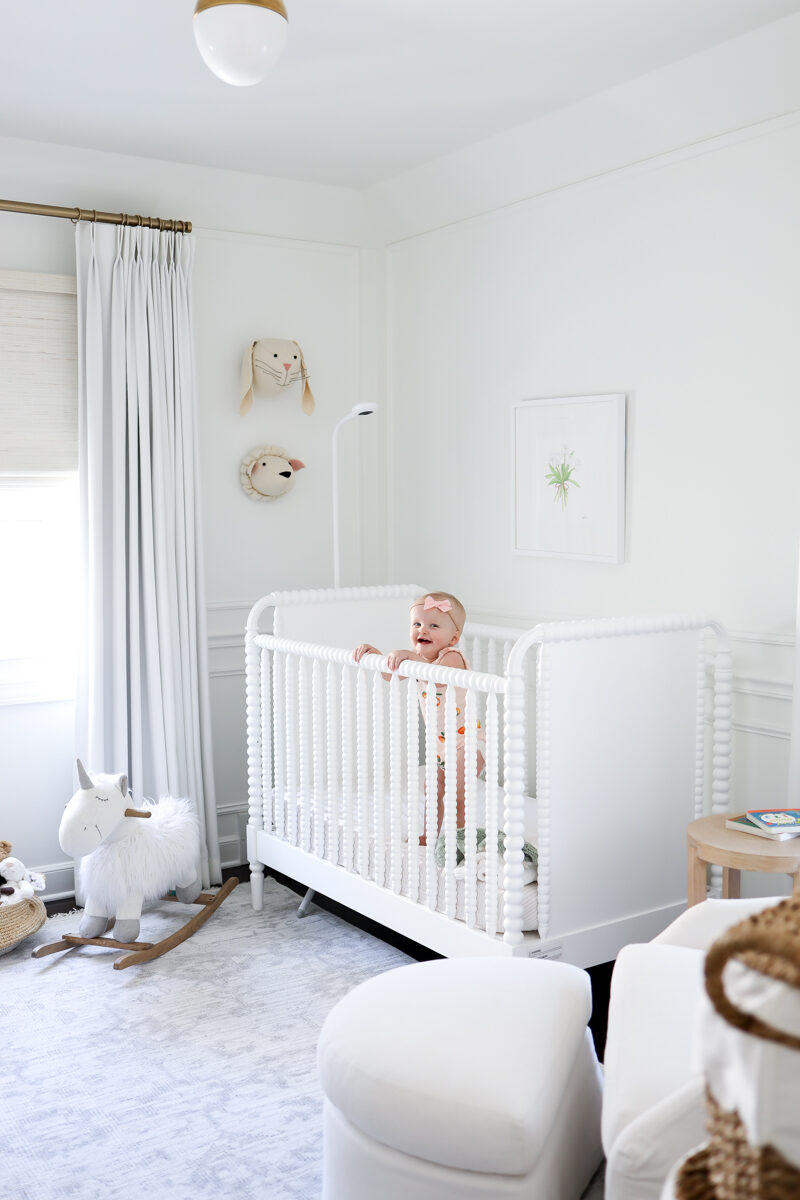
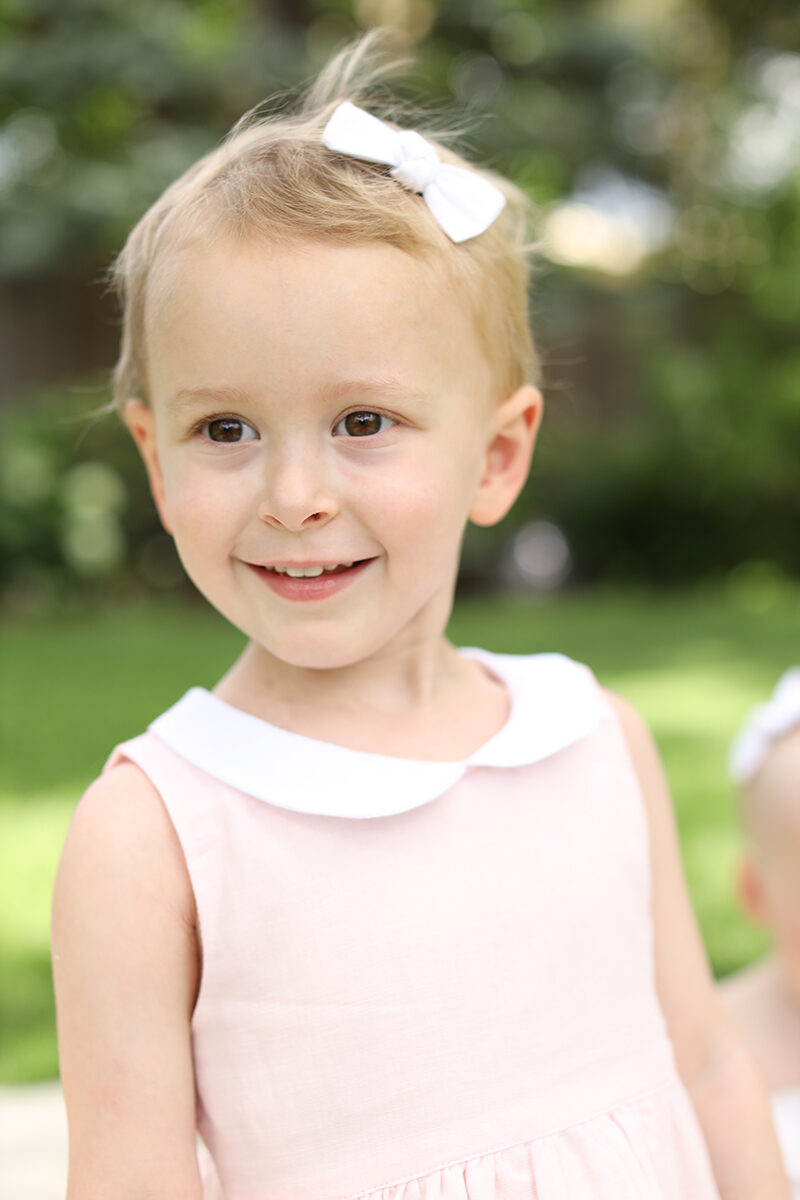
Let’s edit this photo of my daughter, Kate. It’s not a bad photo, but could pop a bit more.
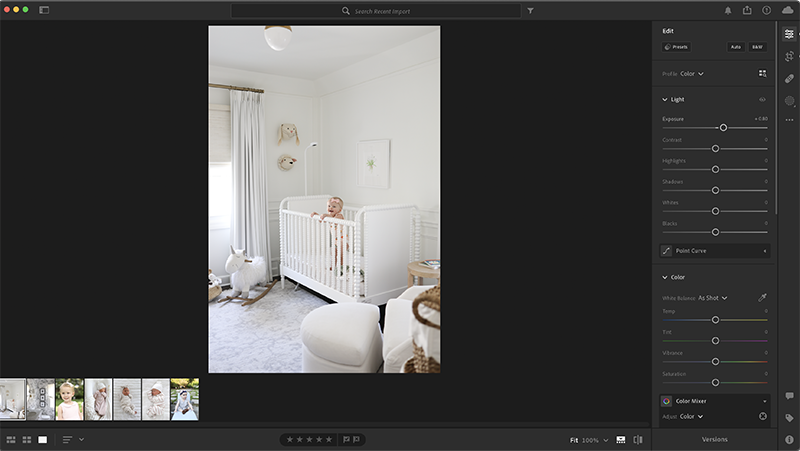
Increase the exposure and “brighten” your photo
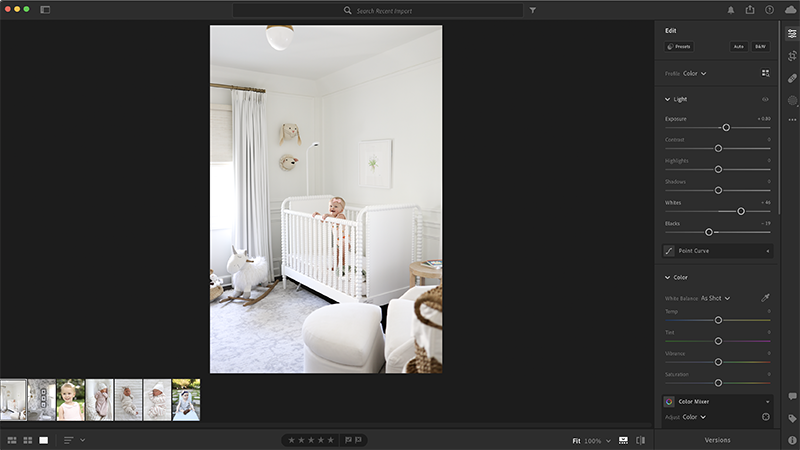
One of the first things I like to do is increase the exposure, which is without question the step that will give you the biggest ROI. It’s an essential step in the editing process. Look at the difference when you slide the exposure slider to the right. It brightens the room, brightens skin tones, and takes your photo to the next level. It is, in my opinion, the easiest way to make a huge difference.
Here’s a closer look.
Now let’s make the photo pop
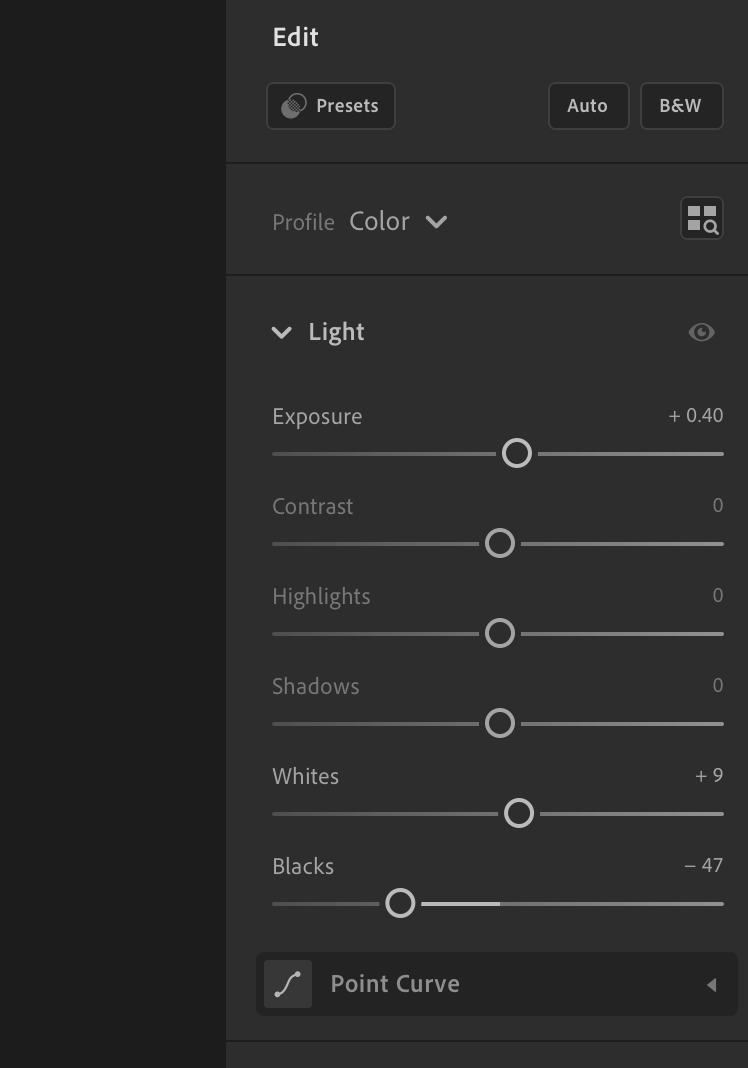
You could easily stop at exposure with this photo, but why would we do that? This is another easy edit that isn’t as drastic as editing the exposure, but increase whites and decrease blacks slider a little bit. Just adjust the black slider to the left and whites slider to the right. This makes your photos just a little brighter so they really pop. Again, there’s no magic number, so you’ll have to eyeball this one, but don’t overdo it. It’s just a little brighter.
The biggest perk of Lightroom is batch editing. Just click on the photo, press command C. Then click on another photo and press command V to paste. Watch the magic happen. If you find yourself using similar settings time after time, consider creating your own Lightroom presets!
How to create a preset in Lightroom
After editing an image, at the very top of the edit panel on the right is a button that says preset. Click preset and then the +. Check the settings you want to include and name your preset. If you adjusted the white balance, I’d recommend not including that. That’s it! You can still edit a photo after applying a preset, so you really want the basics (think brightening and sharpness) but I almost always have to adjust my exposure or whites a bit. Keep in mind that a “brightening” preset will look different on different photos (especially if they were shot at different times) so you will likely make adjustments. You could definitely apply a basic edit to one, tweak, and then batch edit. I prefer to edit one photo from a shoot on my own (from scratch) and then try copying and pasting that to each photo from the same shoot. Even then, they’ll require some editing.
Adjusting the color temperature or white balance
If the white balance is too cool or too warm, you’ll want to adjust the temperature of your photo. These color adjustments can make a big difference. The general rule of thumb here is that if the photo is too cool (blue) you’ll add yellow, and alternatively, if it’s too warm (yellow) you’ll add blue.

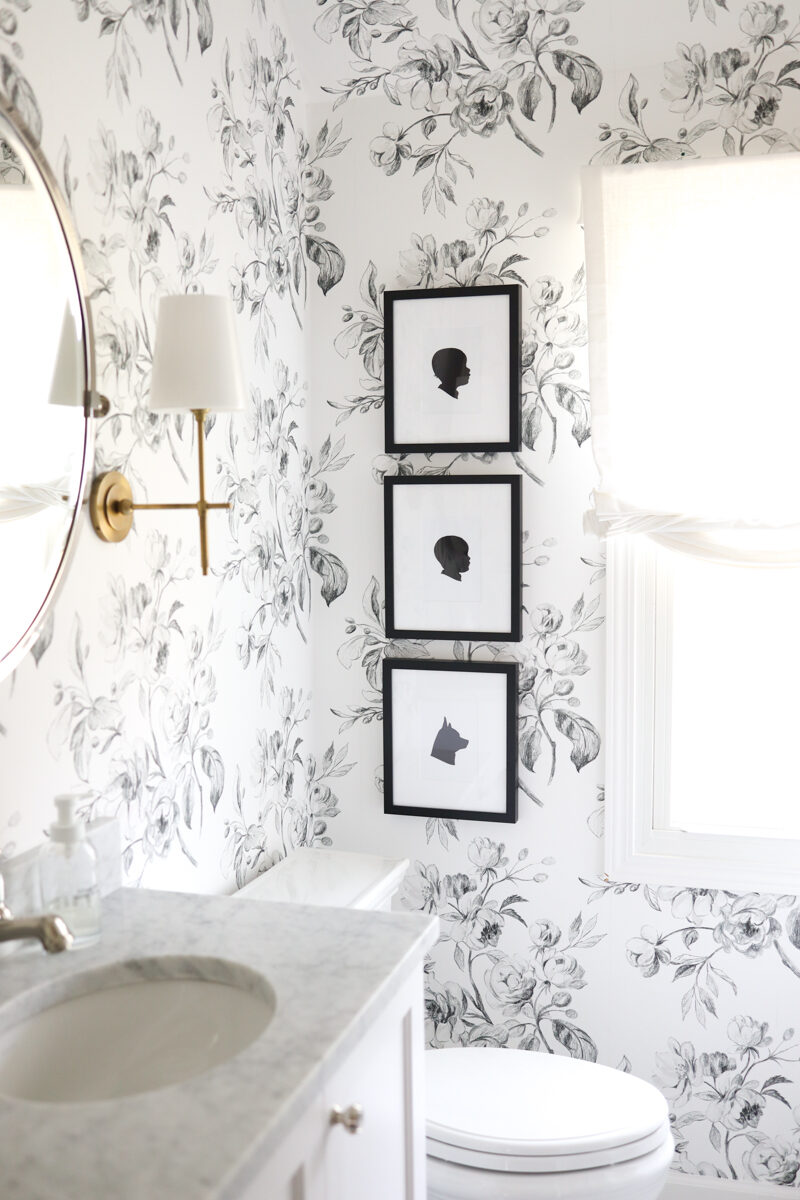
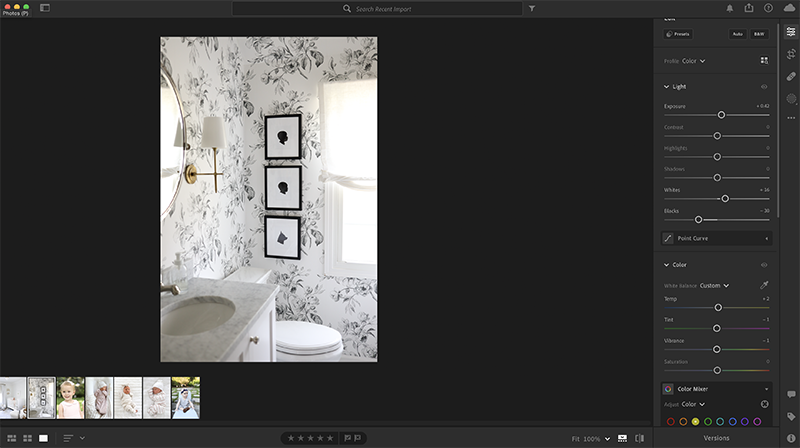
This photo is a really good example of a photo that you probably would have thought was good enough before editing. I barely touched the exposure but still really made it pop.

Adjusting temperature or white balance
If the white balance is too cool or too warm, you’ll want to adjust the temperature of your photo.
Adjusting clarity
The Clarity Slider really enhances your images and texture by increasing midtone contrast. It adds structure and creates a sharper image, and is something you definitely don’t want to overdo. A little clarity (in moderation) really improves a photo.
Sharpen your photos
I don’t like my photos to be too sharp, but sharpen them just enough to make them crisp. Sometimes, I’ll increase the noise reduction to smooth out the sharpening, which might not make sense. It’s honestly so subtle – the best way to see what sharpening and noise reduction can do is to zoom in and play around. It is important to remember that the sharpening slider will not recover lost detail in a photo, but does create the illusion of detail and sharpness. The detail slider adjusts the amount of sharpening to the details in your photo.
How I remove blemishes
I prefer Photoshop’s stamp tool for blemishes or spot treating. Let’s say I wanted to remove the dirt from the ground in the above photo. Just press the letter S and the stamp tool will highlight. Click on it and make sure you’re using the clone stamp tool.
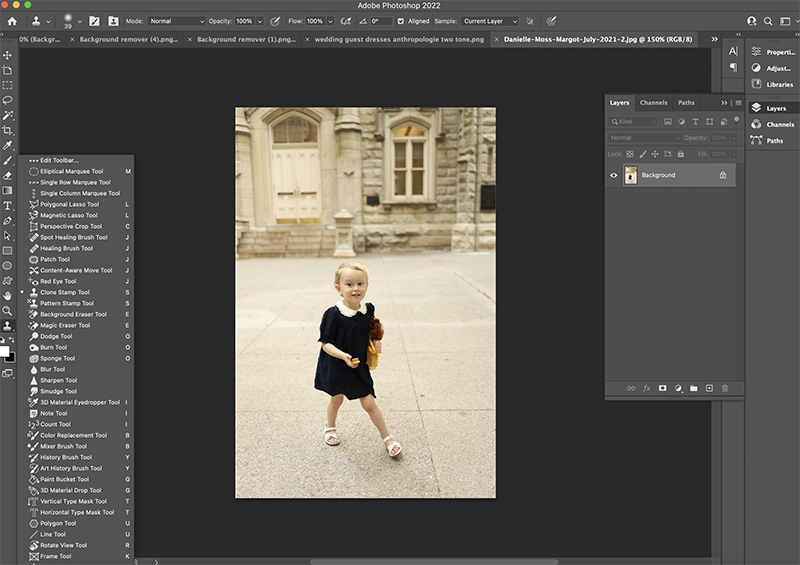
Zoom in my pressing command + and select an area right next to the blemish by clicking and holding down the option key. This was impossible to screen shot (sorry) so hopefully this explanation helps. When you click on a clean area next to a spot, imagine that Photoshop is taking an image of that area, or “stamping” it. That is now your stamp. To “stamp” you’ll just click on the spot, and the clean area will basically stamp or paint over it. You can adjust the opacity if you don’t want the circle to be too pronounced, and I recommend having a soft brush over a hard one with a very set sharp diameter. I need to find a better way to share this – maybe a screen recording on IG.
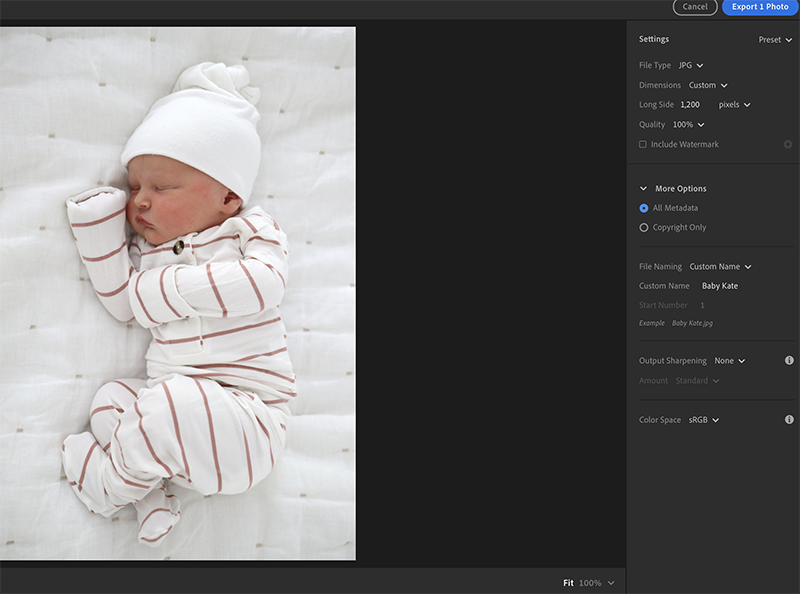
Export your photos
Lightroom actually saves your edits in Lightroom, and will ask if you want to back up the catalog and the correct answer is yes. You definitely do. Go to file and then export. You can save full-size, high res images or save for web. If you’re saving photos to print, you’ll want full-size. Select Copyright only to protect yourself when uploading images to web.