Home
How to Arrange a Stairway Gallery Wall

This is probably the least technical “how to” post that will ever be written. But I think it might be one of the most helpful, because committing to hanging a gallery wall is the hardest part. I’m here to help those of you who like me, want to hang an “imperfect” gallery wall. Gallery walls can be a little daunting but they really don’t have to be too complicated. So here’s how to arrange a stairway gallery wall by eyeballing it. And I’m including links to all of my art at the bottom of this post!
How to Arrange a Stairway Gallery Wall
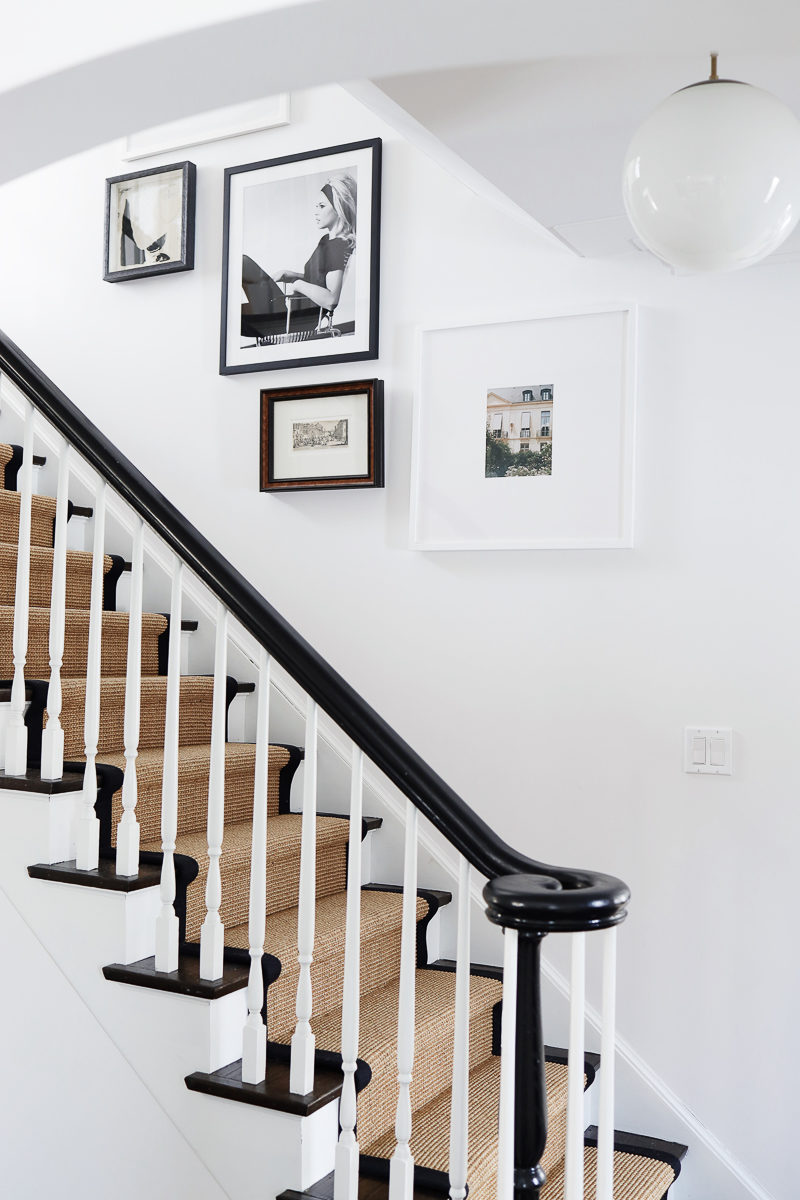
Over a year after moving into our house, I snapped a photo of the entry and it was then that I realized how empty it looked. I decided that a gallery wall was the answer to our empty entryway problems and Conor was on board, so we got to work. We used a few pieces we already had and ordered a framed print from Anecdote, and three more framed photographs from Sonic Editions. Why no family photos? Well, we have family photos on the shelf in our entry, in the living room, office, our bedroom, basement, and we’re adding a few to the upstairs hallway, so going with art felt right.

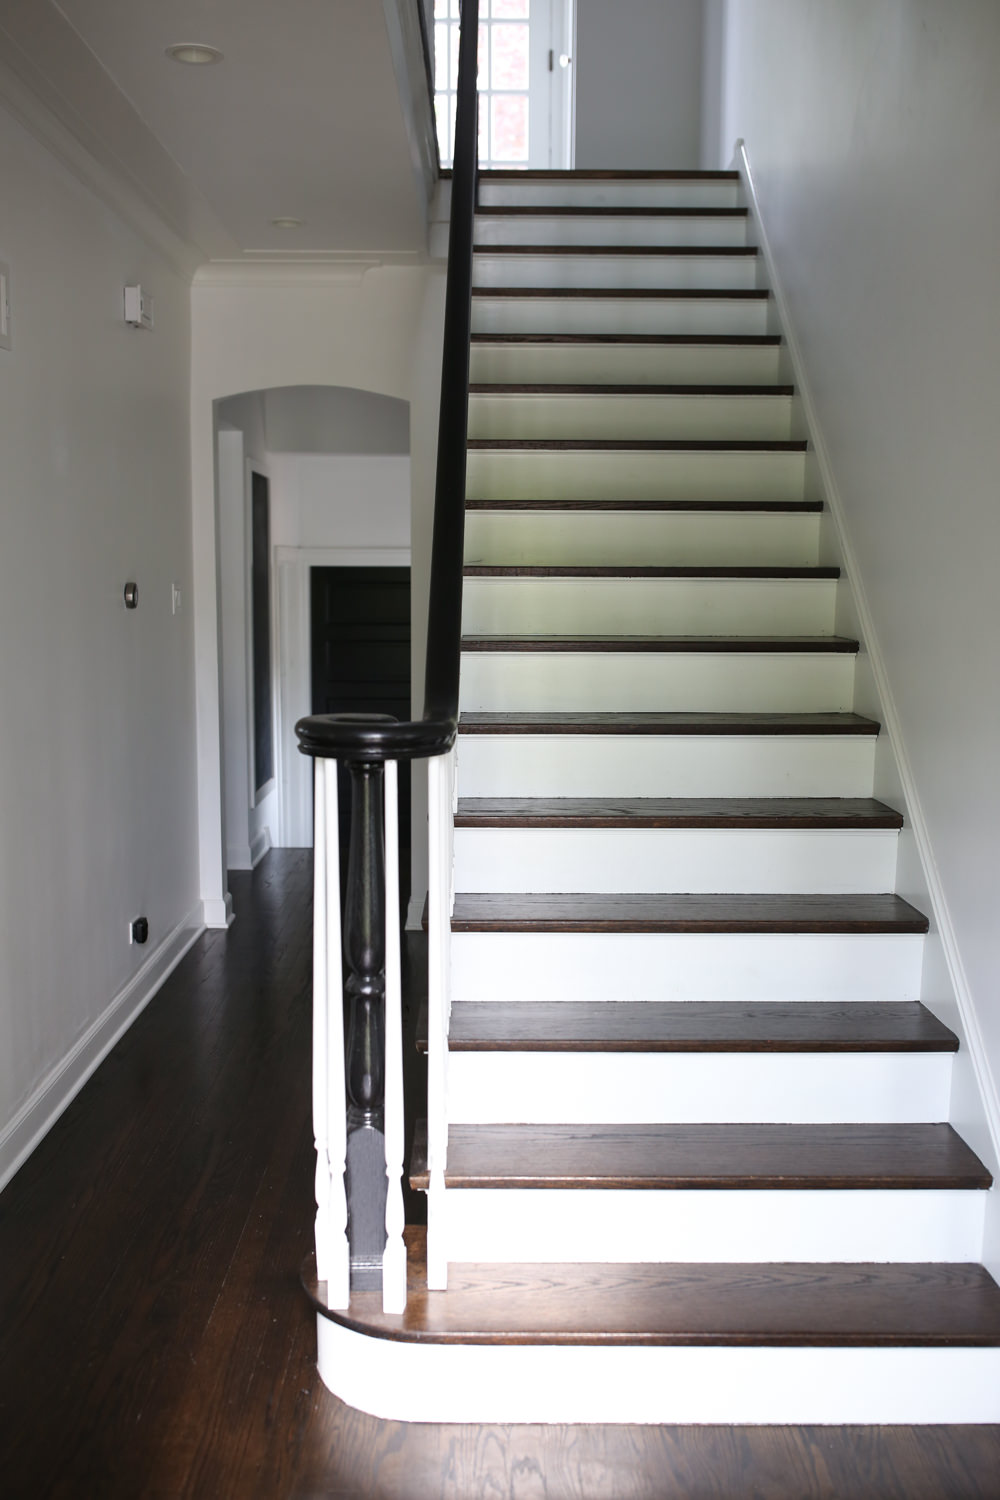
Stair Runner Before and After
Adding a runner
The first step was adding a runner. This was mostly done for safety reasons (and comfort) with the added bonus of warming up our home. When Margot was a baby, I slipped going up the stairs while holding her. She was fine but I got a quote for an almost identical style runner for over $3000. I vowed to literally tread lightly knowing that we’d need one as soon as Margot started going up and down the stairs on her own. You can read about that process and get details on our stair runner in this post.
Choosing a runner
Months later, Buddy fell down the entire flight of stairs so I called my interior designer friend Kira David. She ordered swatches from DMI and had them to me within a few days. The quote came at more than 50% less than the first quote, and installation took place less than two weeks later! It’s a softer sisal and very padded, safe and inviting, and looks exactly how I hoped it would. I went with Paradise in Cobble. You can order it through Kira, or your interior designer if you have one.
Baby gate details
You can read more about how we baby and toddler-proofed our home in this post. Some parents choose to wait and see how their toddlers handle stairs, so that’s what I decided to do, fully expecting to add one a few months later. Margot is just not a climber and hasn’t shown a lot of interest in climbing, so for now, we haven’t needed to add one.
A Simple Stairway Gallery Wall

My gallery wall layout process
If you want to cover an entire wall in pieces of art, this process is for you. And it’s hardly limited to stairs – you can create a gallery wall in your dining room or any living space in your home. The first thing you’ll want to do is find the right wall space and it’s a good idea to have a mix of art to use. I like to see a mix of vertical and horizontal pieces, also known as portrait and landscape. There are so many different style gallery walls, and I love the clean lines of ours. If you’re looking for stairway gallery wall ideas, this one’s for you.
What you need
All you need is a blank wall in your own home, picture frames, and if you’re not creating a grid, an eclectic mix of art prints. This is the easiest way to create a gallery wall, and the important thing to remember, is that it doesn’t have to be a perfect gallery wall. Keeping the arrangement imperfect in terms of height and spacing makes the process a lot easier. But – you will want to consider the biggest piece and where it will go.
How to start
We started one-by-one, hanging pieces as we went along, considering where larger pieces would go. I’d have Conor hold a piece up and move it around until we found the right spot. The only “plan” was to not have two pieces that were too similar next to each other (so spacing out photographs) and not having all the black frames next to each other. So we kind of laid it out but honestly didn’t overthink it and got to work. I love the look of matching frames and perfect spacing, but that’s not the look we were going for, so I’m going to share some of the mistakes that I often see when it comes to “imperfect” gallery walls like this one. And the end result was exactly what we wanted.
Stairway Gallery Wall Template
When you choose an imperfect gallery wall, there isn’t a template! This is the most relaxed and fun way to feature art of various sizes. You don’t need to match frames and it doesn’t have to be perfect. So we got to work on hanging art on our stairway gallery wall.
Here are some of the general guidelines to consider and common mistakes you might want to consider.
- Too much space between frames
- Not enough space between frames / clumping everything together
- Not enough variation in frame styles and sizing
Going for it
Since nothing was mapped out in advance, we knew we might need to order another small piece or two to fill in any gaps. But the best way to do this is to just go for it. Again, you’ll want to plan for the largest piece and make sure you consider having different sizes scattered throughout, and want to mix up the color palette and medium (photography vs prints). We didn’t really consider a focal point, and that worked well for this style.

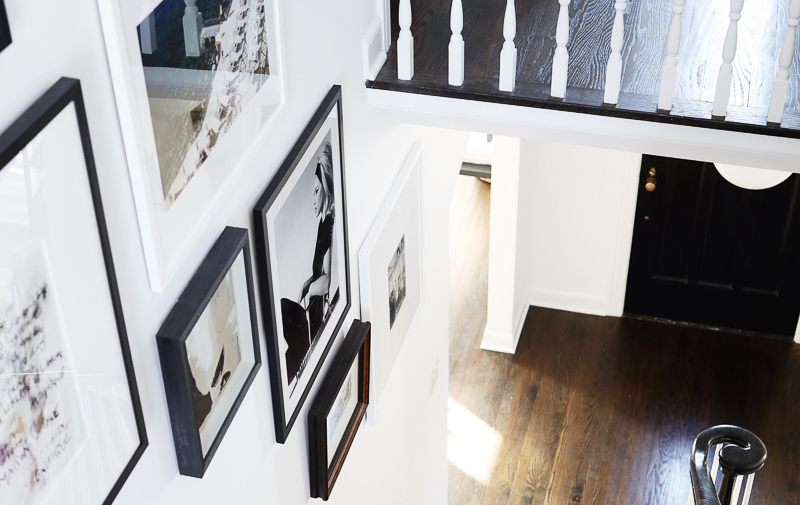
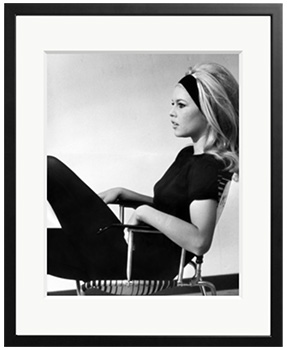
The white frame with a Paris photograph from one of our trips went up first. Then the small engraving and Brigette Bardot (I love her). You can see that we kept things just a little uneven, not stacking anything too perfectly.
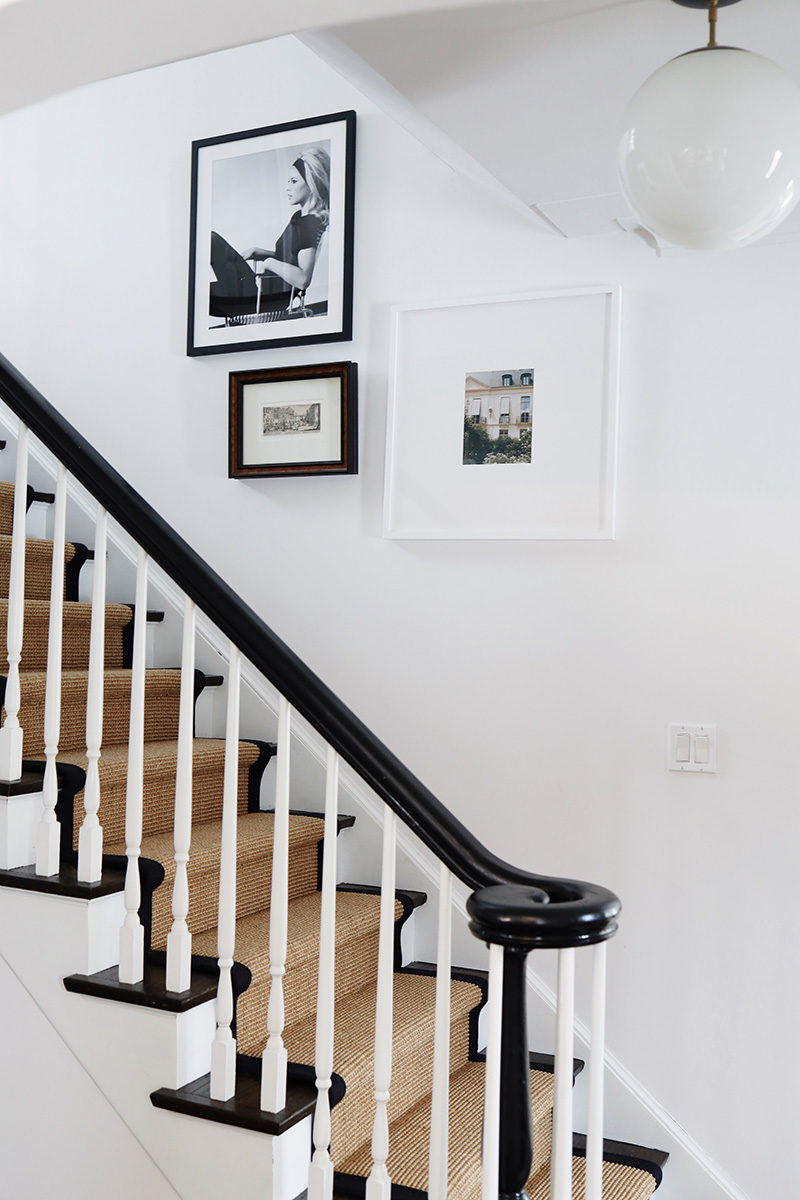
We opted to go up before adding more below. This helped since figuring out the top was a bit tricky. How high should we go? Figuring out the layout of your gallery wall can be tricky, especially when it’s on a staircase. So we started “low” and moved our way up.
Enlist someone to help
Conor would hold each piece and shift up, down, left, and right. Stepping back to see what worked where was key. Bringing this small, square print to the left better filled the space and and kept things looking less perfect. As you can see, we had a few large pieces up first, which is a great way to start. Then fill in with smaller pieces for the perfect (imperfect) picture wall.
I can’t stress this enough: it doesn’t have to be perfect!
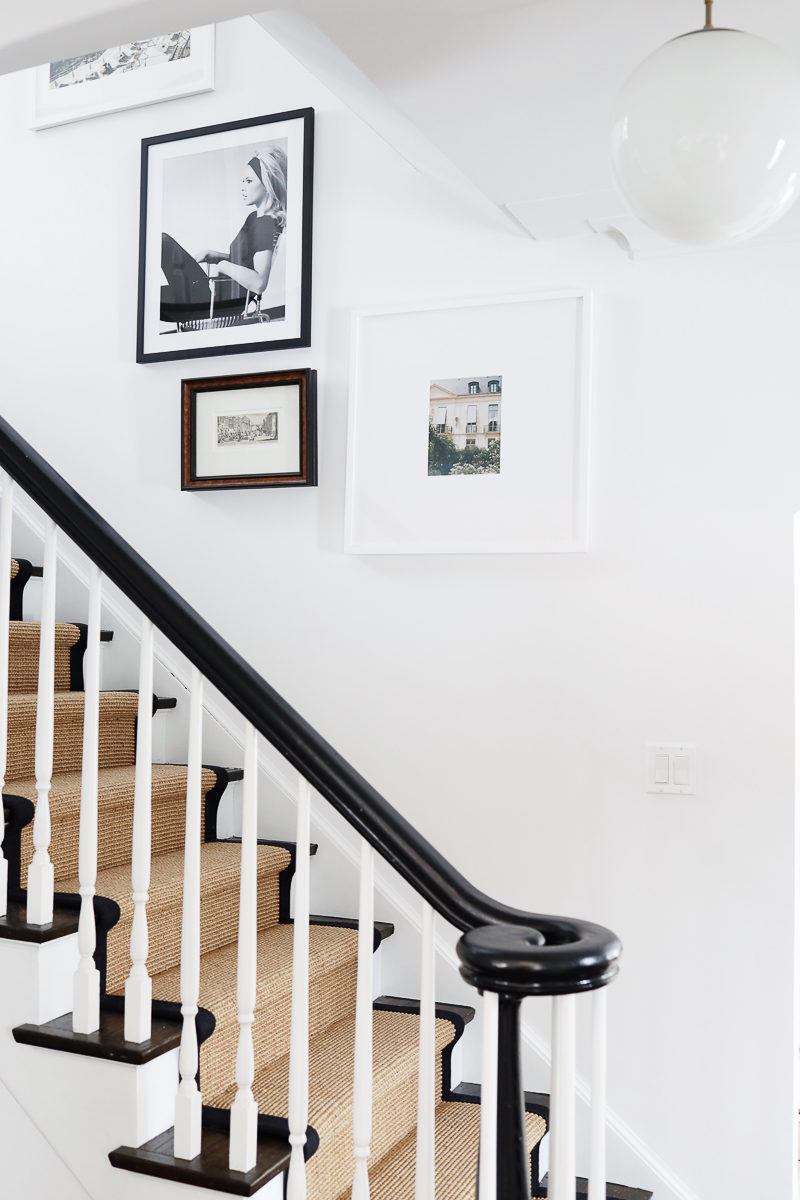
As you can see, there’s more space to the right than there is above, but that’s ok. At the end of the day, it doesn’t have to be perfect, and a little bit of empty space is ok. Try a different combination before putting a nail in your wall and see what works.

Here’s a shot from the entryway.
Step back, take turns seeing what looks good while one of you holds a piece up. Take photos. Walk in and out of the room. That might all sound like a lot of work, but it’s less work than hanging art with one of those laser level things. I actually consider this the fun part.


And…the gallery wall is done.
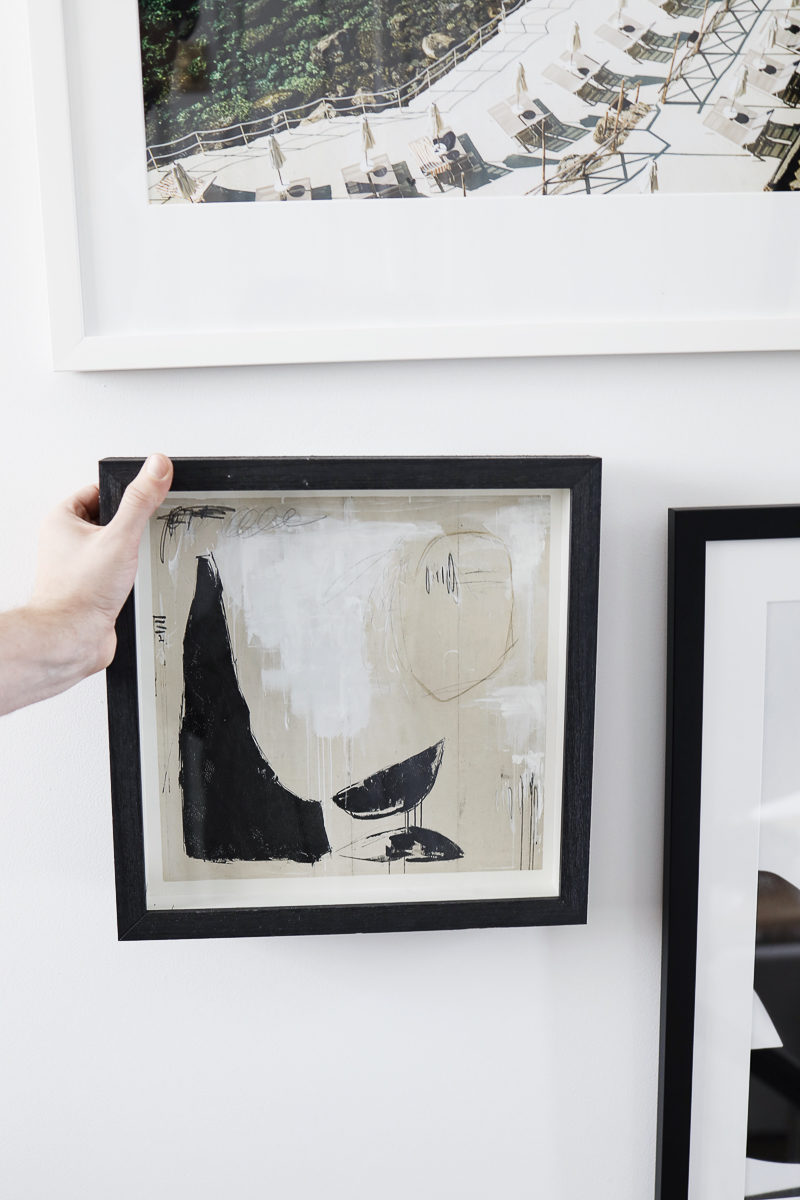
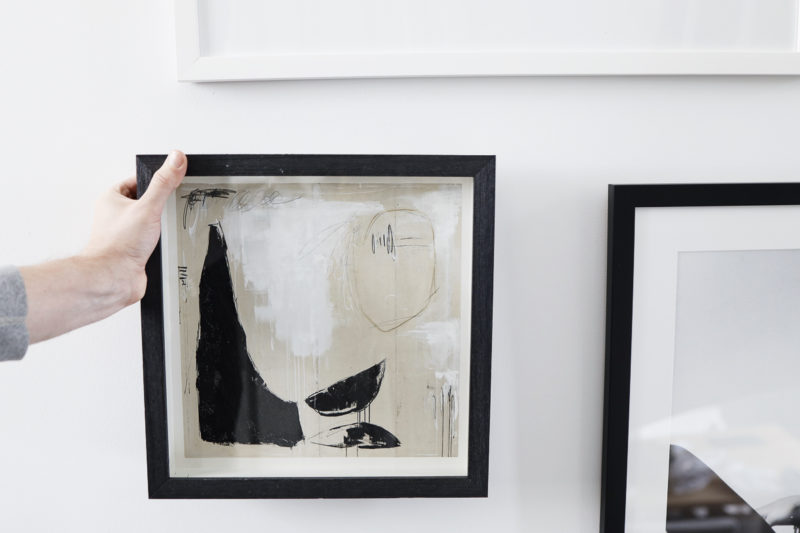
I was loving how this looked but it needed a little something different. Maybe a gold frame? And the lowest piece was still a little too high (just a bit higher than eye level) for anyone standing in the entry. It needed one more piece.

How to Arrange a Stairway Gallery Wall
The art I used for our stairway gallery wall

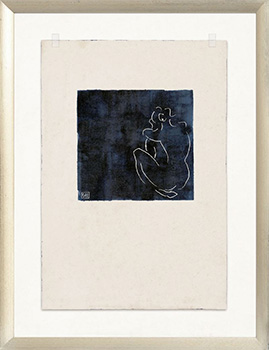

How to Arrange a Stairway Gallery Wall
Links to our stairway gallery wall frames and art
Small gold frame (vintage) 14″h x 16″w
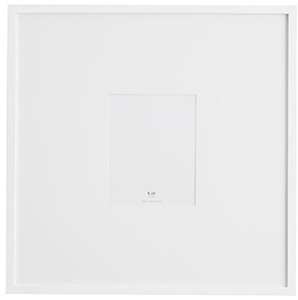
Large white mat frame with Paris photo (from our travels) 25″sq
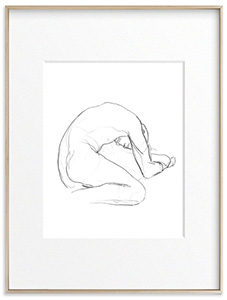
Small engraving (vintage) 12″h x 15″w
Brigette Bardot framed photograph 25.5″h x 21.5″w
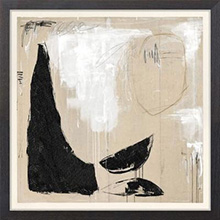
Small abstract print, 13″sq
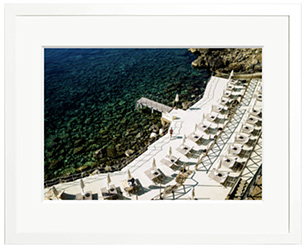
Il Pellicano framed photograph, 21.5″h x 25.5″w
Francine Turk print framed at Hobby Lobby, 26.5″h x 22.5″w
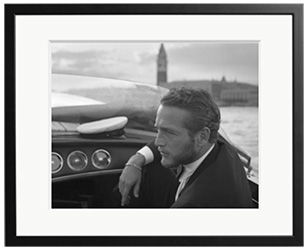
Paul Newman framed photograph 17.5″h x 21.5″w
This post contains affiliate links. If you purchase something using my links, I may earn an affiliate commission at no cost to you.