Baby and Kids
The Best Budget-Friendly Room Darkening Blackout Shades
Babies sleep best in a dark room. The darker the room, the better the nap, and like all parents, I like a good nap. I turned our home office into a nursery when we had our second, and needed a way to keep the room dark. I finally came up with a solution that doesn’t compromise the ability to bring light into our baby’s room when she’s awake, but that also leaves the room pitch black for naps and bedtime. If installed properly, you’ll have zero incoming light and completely darkness, so these would be great for light sleepers, in media rooms, and home theaters, too. Here are the best budget-friendly blackout window shades for babies and toddlers.
The Best Budget-Friendly Room Darkening Blackout Shades
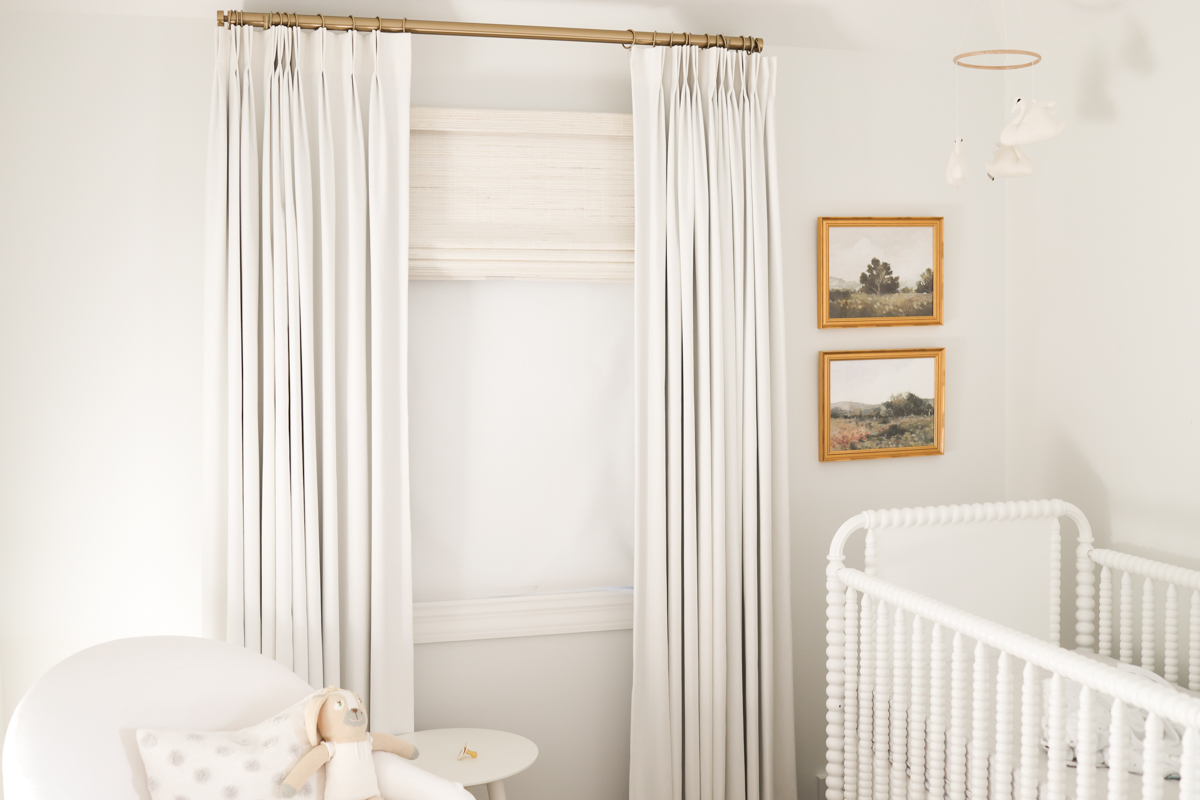
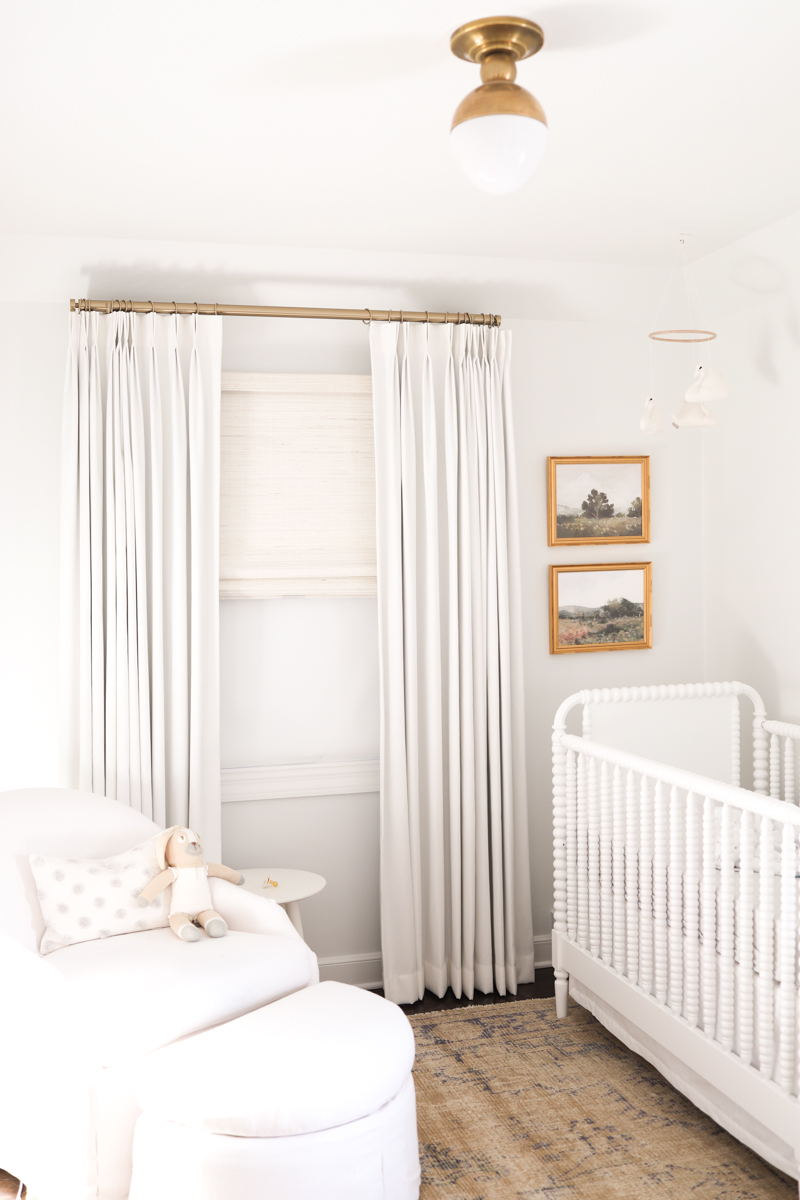
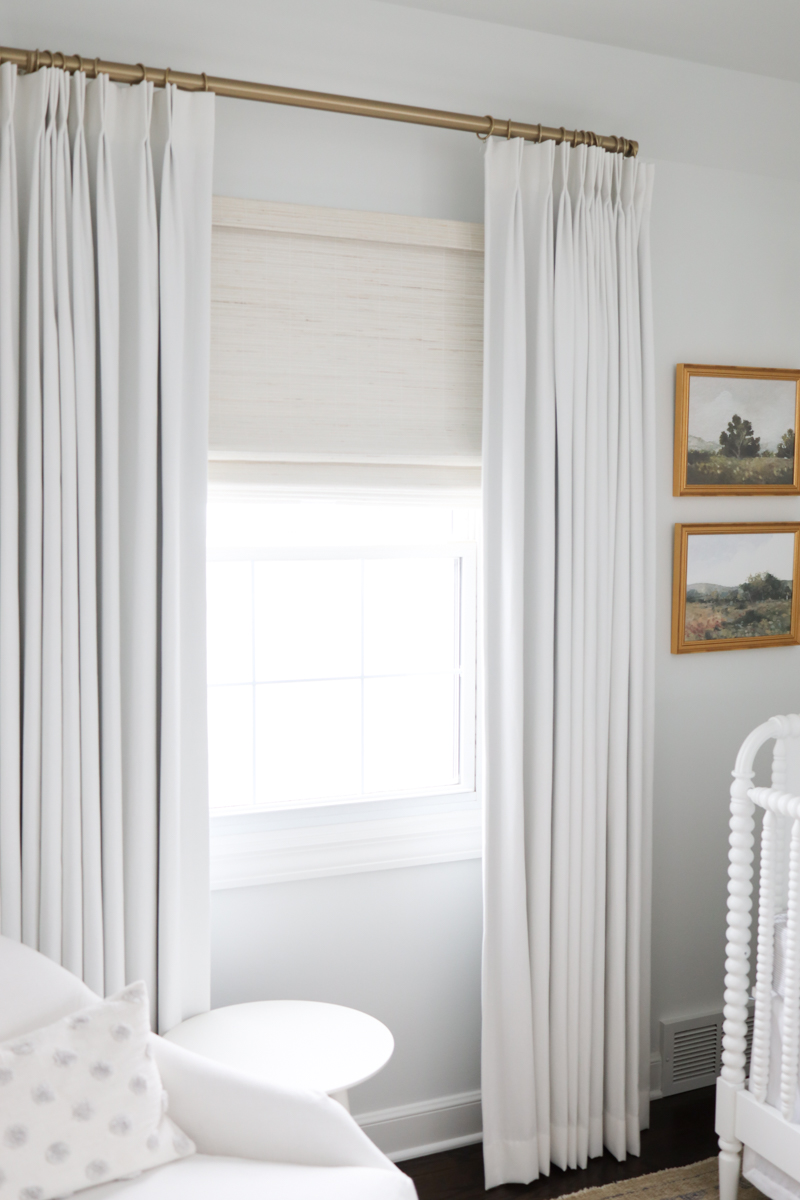
I love our Hunter Douglas window treatments, but our windows only allow for an outside mount. I chose woven wood shades with a cordless lift system. They are lined with blackout fabric, but because they are mounted outside of the window frame, there are light gaps, even with blackout lining. We have blackout roman shades and blackout curtains, but the outside mount allows too much light to come in through the top and sides. A little light leaking in is fine for our bedroom, but babies sleep best in a dark room, and nap times are longer when a room is dark. I needed a solution that did not take away from the beauty of our beautiful roman shades and curtains.
Making my baby’s room pitch black for naps
I tried to use these travel curtains under our woven shades. They’re a great option for travel, but are not ideal for home. Since they’re so long, they showed behind the curtains and looked messy and there was a little light that leaked through. There wasn’t really a way to open the shades during the day and because they suction, some light still filtered through. The solution was fine and I recommend the curtains for travel, but it wasn’t great long-term. So I decided to order complete room darkening shades that would function a little better.
Why I like these shades
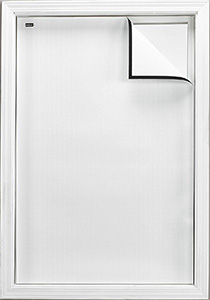
Even with blackout woven shades and curtains, light leak is inevitable. And that’s why I love these shades. Let’s be clear. They are not beautiful, but they’re thin, easy to install, and you don’t really have to see them – they don’t interfere with our roman shades and curtains. And they are one of the best options for true blackout effect. We can open them during the day, they don’t hang below the shades, and they’re a true blackout – and zero light filters through. They are budget-friendly and as un-DIY as anything could possibly be, and are a true blackout window shade. And they come in two standard sizes and can be cut down to perfectly fit your window. Measure, trim, attach the included velcro strips and done. Shop Kate’s nursery here.
Other blackout options
If these aren’t for you, look into cellular shades, blackout roller shades, and blackout blinds, but I needed something completely flat that would basically cling to the window for total darkness. These are a great choice because function as a blackout liner, and do not let any natural light in. They work great under every shade type since they’re basically an overlay that attaches right to your window, and you can remove them any time. I’m sure there are better custom options, but these are reasonable window coverings that did the trick.
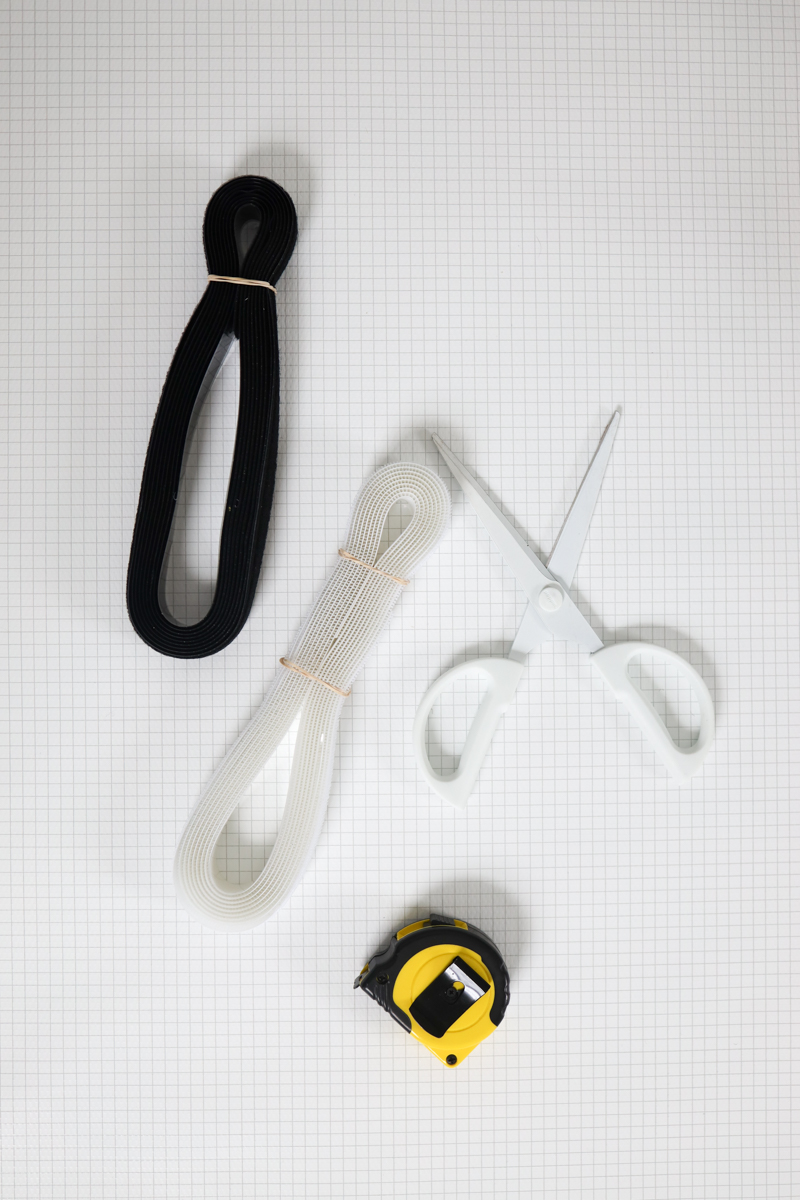
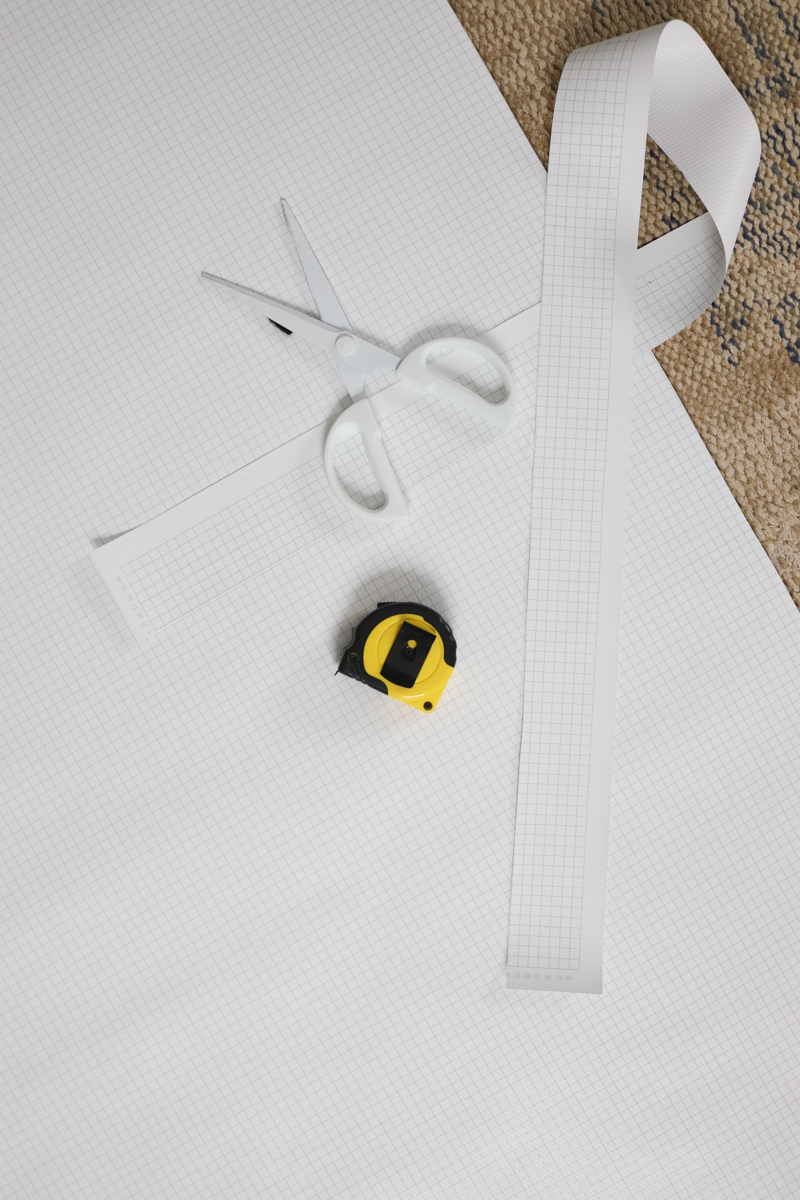
What you need to install the Blackout EZ TM Window covers
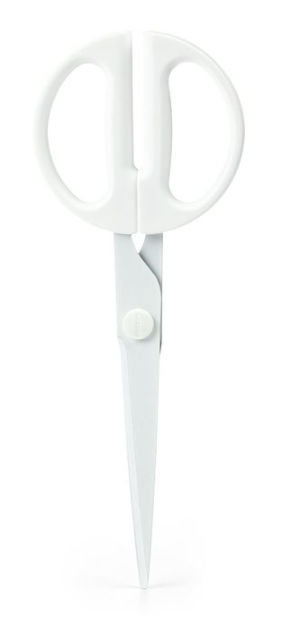
There is zero installation hardware. You just need a tape measure and scissors, and will have a completely pitch-black room once you’re done. The whole thing took about 15 minutes start to finish and left us with total blackout after installation (and longer naps). And I cannot stress that I’m not the best at this sort of thing. I once tried to mount a toilet paper holder and ended with it falling off the wall. But this? Super easy.
How to install a Blackout EZ TM Window cover
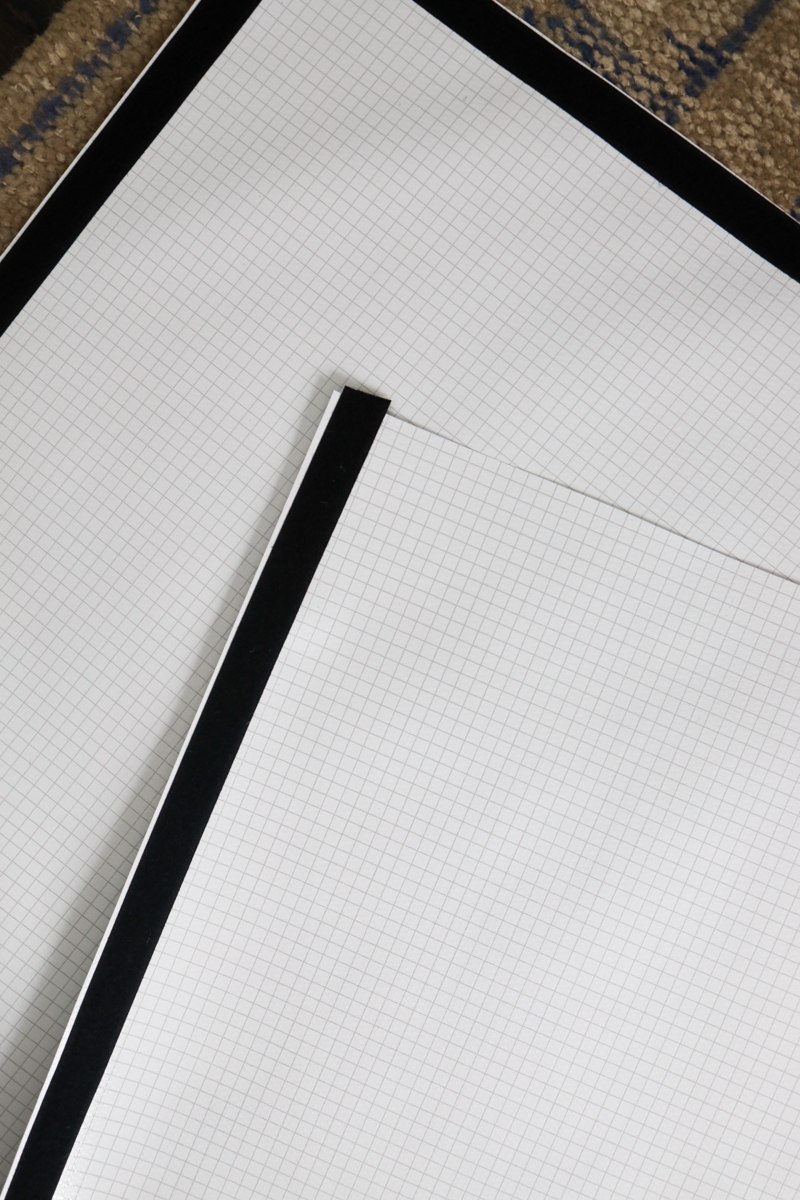
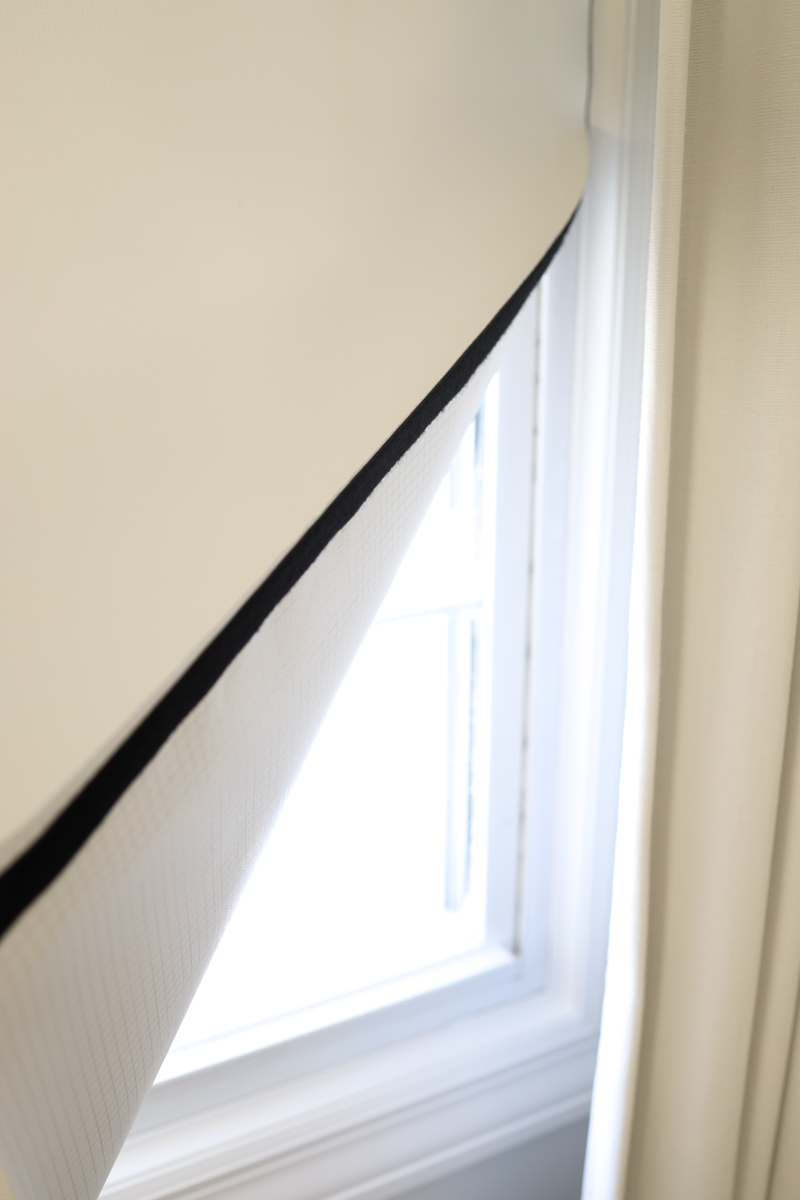
1. I’m not really the best with easy DIY, but if you can handle easy installation, you can do this. My blackout lining / window cover is just so easy and blocks all light from the outside world. First, measure the correct dimensions of your window to get a perfect fit. Fortunately, the height lined up perfectly, so I only needed to make one cut. The grid pattern is on the back of the shades, and makes it so easy to find the right dimensions and to cut a perfectly straight line. Make sure not to cut too much – gaps will let in external light.
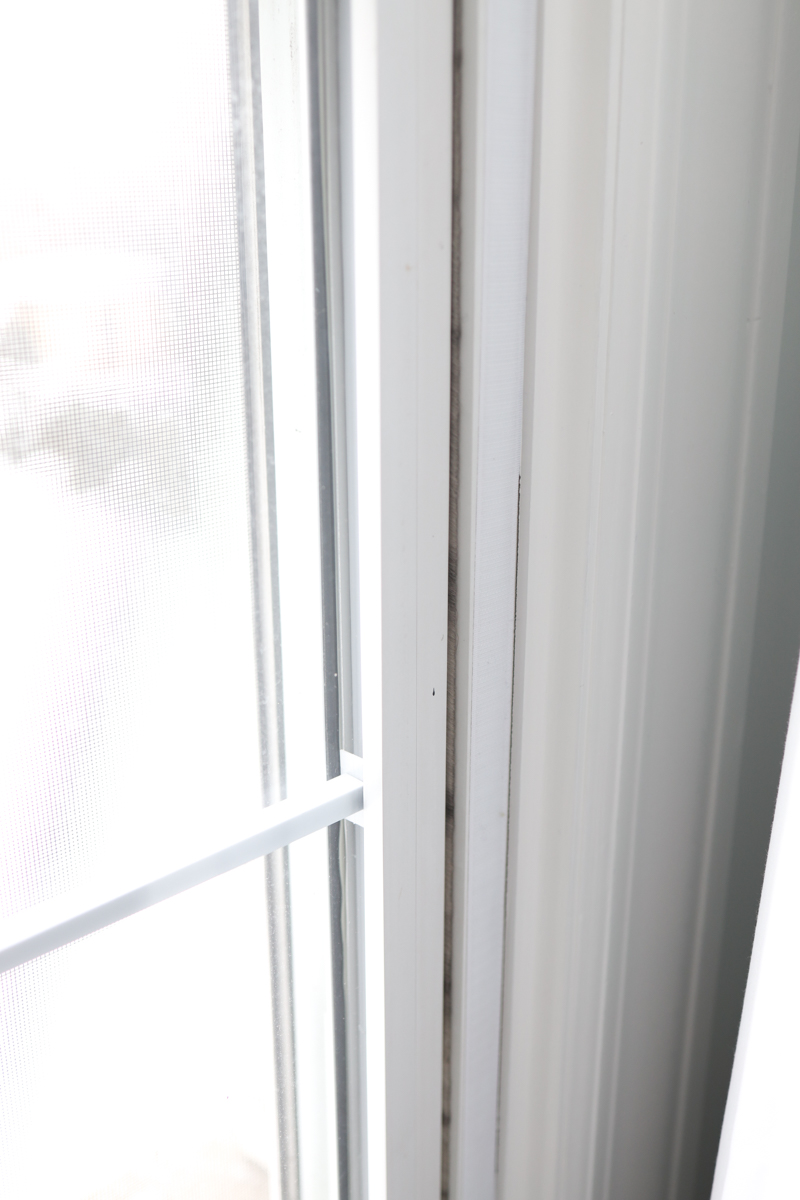
2. Eyeball the length of the velcro that was needed (or measure if that’s your thing). There’s extra velcro so it’s ok if you need to trim once you cut it. Peel the backing and stick to the shade. Stick the other side (the white side) to the top of the window frame to start, where you want to attach the shade. I attached it to the top and sides, but started with the top. Assuming you have some sort of window treatment over these, which I would recommend (aesthetically) you won’t see the velcro. I do have a white piece of velcro that isn’t covered at the bottom of the window and it blends right in.
3. Line the top velcro piece with the top piece on the window (behind your cordless shades or curtains) to install. Follow along the sides. It’s that easy.
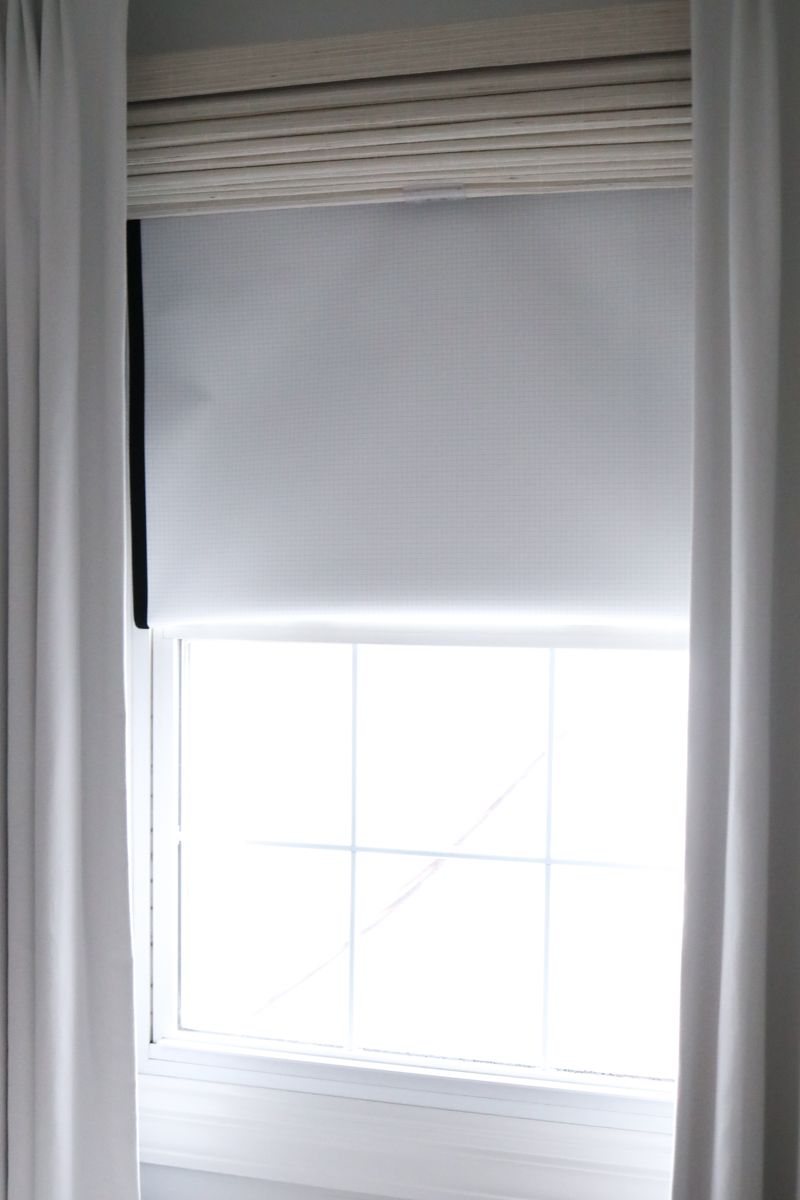
5. I like to take a small piece of white velcro and attach to the bottom of the front of the shade. Then attach the black piece to the top of the shade. This allows you to “fold” the shade up and have some light in the room during the day, and to fold it down for complete darkness. You can also roll it up to the top – both options work really well.
Be sure to hold on to the extra velcro for that piece at the top. Over time, ours got a little loose and eventually needed to be replaced.

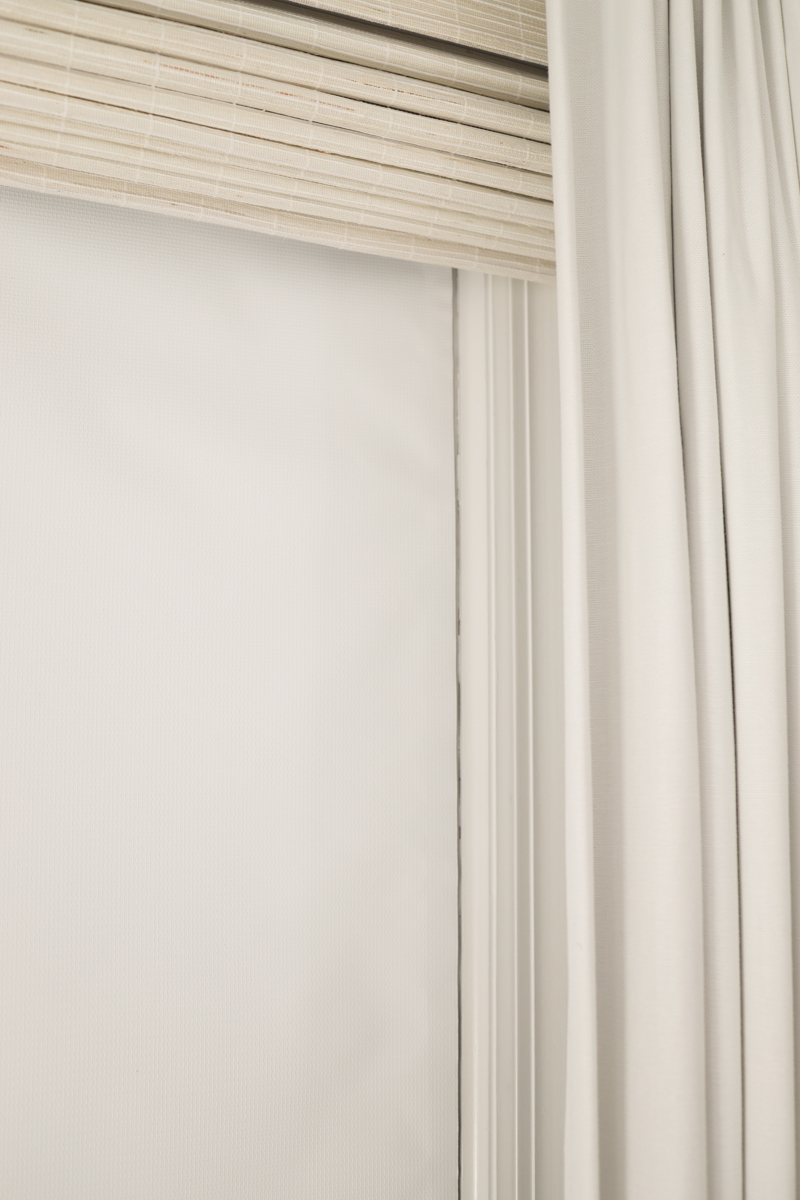
You can (barely) see the white velcro here.
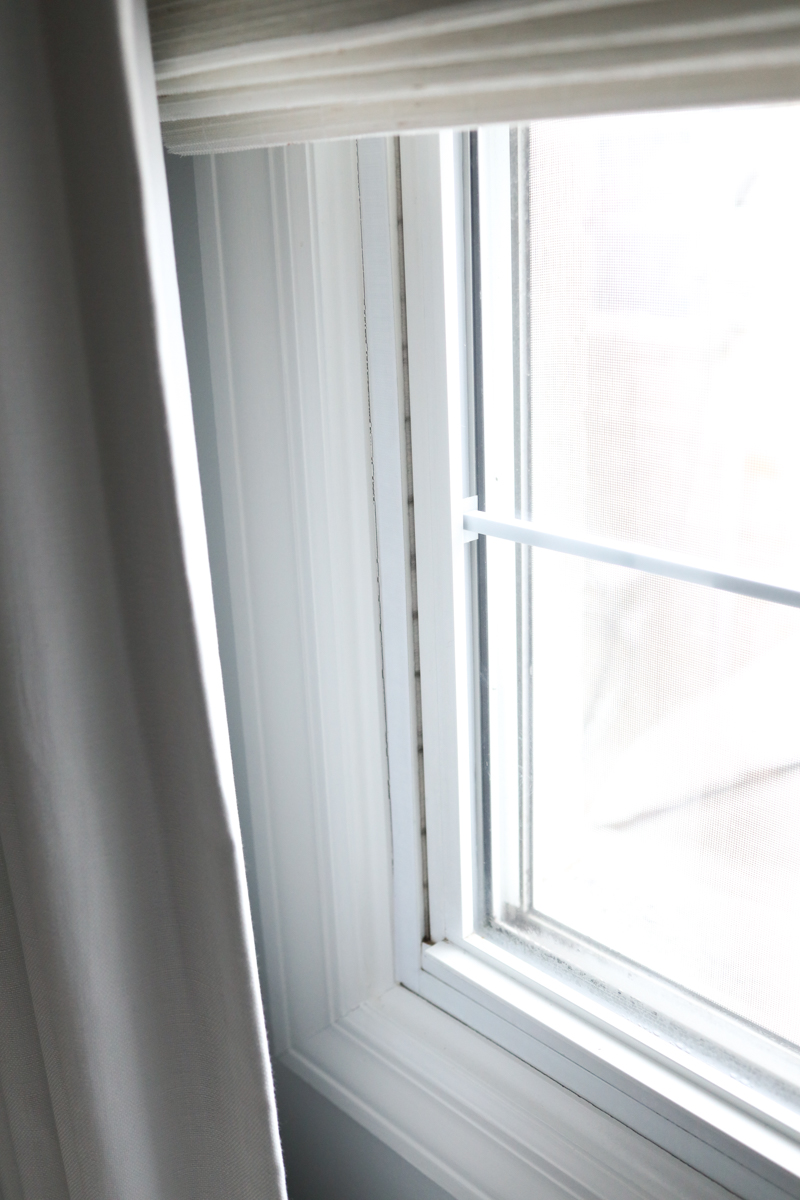
Nice and clean. The shades are installed here, but you’d never know it.
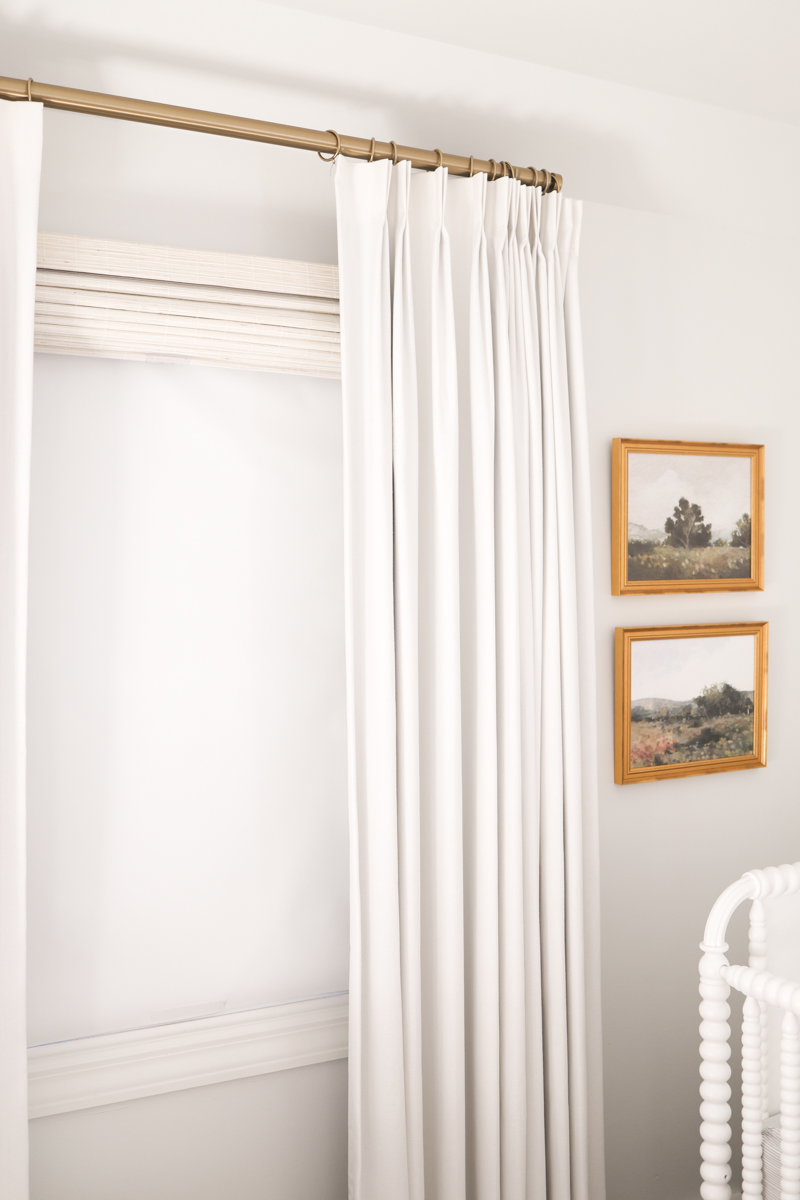
With the shade folded up to let light in.
I attached a piece of fabric to the bottom of the shade and another at the top below our roman shade. Peel the shade off the window (attached via velcro) and attach the bottom piece to the top piece, folding up from the bottom. Then pull the woven shade down halfway to cover the blackout shade.
This post contains affiliate links. If you purchase something using my links, I may earn a small commission at no cost to you.